Seamless Connections: Key Installation Procedures and Recommended Tools for Pre-Insulated Joint Sleeves
2024-01-22
Introduction:
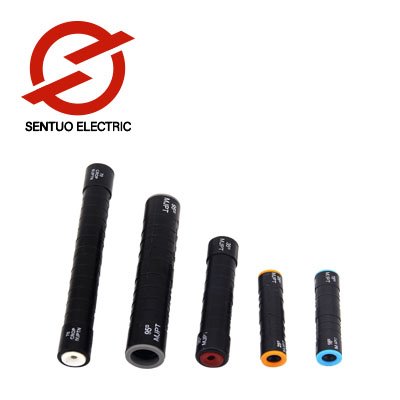
As the linchpin of electrical systems, joints and connections demand meticulous attention to detail during installation. Pre-Insulated Joint Sleeves play a pivotal role in ensuring the reliability of these connections. In this blog post, we will explore the key installation procedures for Pre-Insulated Joint Sleeves and highlight the specific tools recommended for a seamless and effective installation process.
1. Preparation of Connection Points:
- Clean and Dry Surfaces: Ensure that the surfaces of the cables, connectors, or joints are clean and dry before installation.
- Degreasing Agents: Use degreasing agents or alcohol wipes to remove any contaminants that might hinder the adhesion of the Pre-Insulated Joint Sleeves.
2. Selection of Appropriate Sleeve Size:
- Accurate Measurement: Measure the diameter of the cables or connectors accurately to select the appropriate size of Pre-Insulated Joint Sleeves.
- Size Compatibility: Ensure that the chosen sleeves provide a snug fit without being too tight or too loose.
3. Cutting Sleeves to Required Lengths:
- Precision in Cutting: Use sharp scissors or specialized cutting tools to cut the Pre-Insulated Joint Sleeves to the required lengths.
- Even Lengths: Ensure that each sleeve is cut to an even length, allowing for consistent coverage across the joint or connection.
4. Sliding Sleeves onto Cables or Connectors:
- Uniform Application: Slide the cut sleeves onto the cables or connectors, ensuring a uniform application along the entire length.
- Smooth Movement: Use your hands or, if available, specialized applicators to guide the sleeves onto the desired areas smoothly. Avoid excessive stretching.
5. Creating Overlaps for Longer Lengths:
- Overlap Technique: If the length of the connection requires multiple sleeves, create slight overlaps between adjacent sleeves.
- Secure with Tape: Use heat-resistant tape to secure the junctions and ensure continuous protection without gaps.
6. Choosing the Right Heat Source:
- Heat Guns or Torches: Select a suitable heat source, such as a heat gun or torch, for activating the shrinking process.
- Controlled Heat Application: Adjust the temperature and airflow settings to ensure controlled and even heat application.
7. Maintaining a Safe Distance:
- Preventing Damage: Maintain a safe distance between the heat source and the sleeves to avoid overheating or damage.
- Adjustable Nozzles: Use heat guns with adjustable nozzles or diffusers to control the distance and minimize the risk of deformation.
8. Ensuring Uniform Shrinkage:
- Even Distribution of Heat: Move the heat source evenly along the length of the sleeves to ensure uniform shrinkage.
- Attention to Detail: Pay special attention to any areas that may require additional heat for complete shrinkage, ensuring a tight fit without irregularities.
9. Final Inspection and Quality Check:
- Thorough Examination: After the shrinking process, conduct a thorough inspection to ensure that the sleeves have adhered uniformly without gaps or irregularities.
- Magnifying Tools: Use magnifying glasses, if necessary, to inspect small or intricate areas. Ensure that the sleeves meet the desired quality standards.
10. Cooling Period:
- Allowing Adequate Cooling Time: After the shrinking process, allow the sleeves to cool adequately before subjecting them to further stress or handling.
- Avoiding Premature Handling: Patience is crucial during the cooling period to prevent premature handling, which could lead to deformation.
Conclusion:
The installation of Pre-Insulated Joint Sleeves demands precision, attention to detail, and the use of appropriate tools. By following the recommended procedures and employing the right tools, one can ensure a seamless application that maximizes the effectiveness and longevity of these essential components in electrical connections. As we aim for seamless connections in electrical systems, the installation of Pre-Insulated Joint Sleeves becomes a testament to expertise and a commitment to excellence in ensuring reliable and durable connections.


